

How To Repair Headliner In Car
If you plant this post, I'm lamentable.
Sorry that you are facing the dreaded 'drooping headliner curse'! Your friends in the backseat, headliner mussing their pilus. Little bits of cream sticking to your shirt before some of import meeting. Not being able to see anything in your rear-view mirror. I'm not making fun, honestly.
I've been there. I feel for you…
BUT, I am here to help you! Follow this motion picture guide to reattach your headliner. This will cost you less than $50 and an hour or 2 max, of your time.
If y'all buy through links on this site, I may earn a commission, at no boosted cost to you.
The Dreaded Drooping Headliner…
This is the situation I was faced with in my 2004 Honda Accordance:


It could even exist chosen a safe hazard since I had an obstructed view out the rear window…
Ideally you gear up this problem past re-gluing the headliner in place equally described below. If re-gluing is not your cup of tea, then my adjacent recommendation is the button method. This inexpensive and easy solution looks much better than push-pins and will also hold up ameliorate.
Okay, with that out of the way, hither is the process for re-gluing the headliner.
Re-Gluing a Drooping Headliner – Step-by-Step Procedure
Okay, let'due south go alee and get started.
Tools and Supplies:
- apartment-bladed screwdriver
- 3M headliner agglutinative spray
- Phillips screwdriver
- thin plastic putty knife (or credit card-type object)
- clean pigment roller
- animate masks
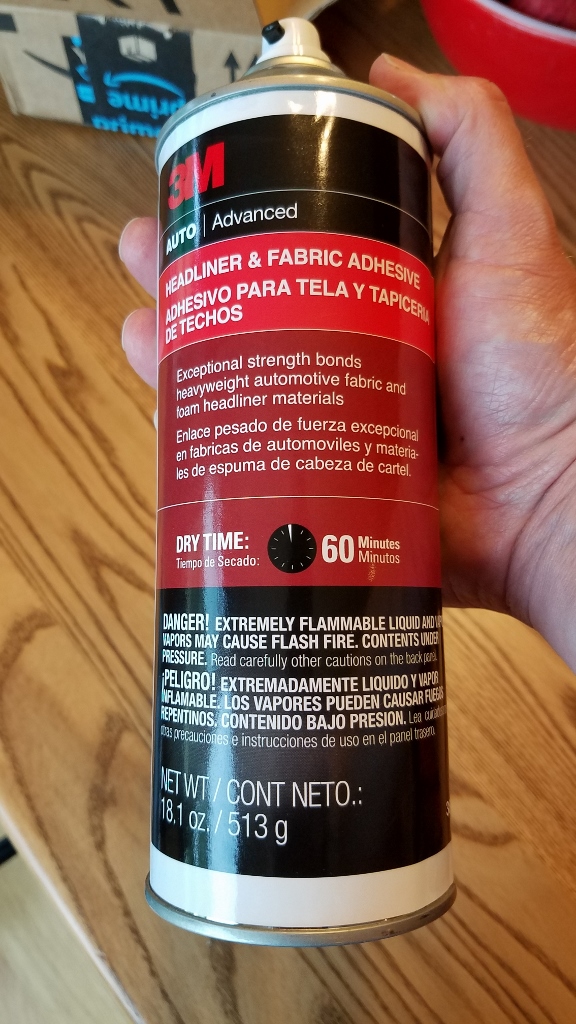
Here are the supplies I used.

You lot really do want to use the 3M headliner agglutinative. It is adequately expensive, but it is worth it. Cheaper adhesives will let go over time, especially in the heat.
A single can might be enough if y'all don't demand to do the entire headliner. If you demand to re-glue the whole thing, then y'all will need 2 cans.
Pace-By-Stride Procedure to Repair a Headliner Coming Loose
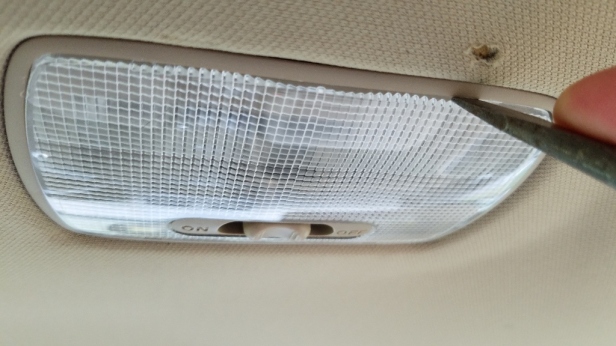
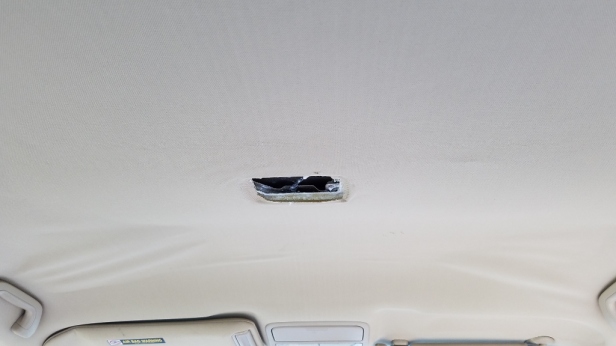
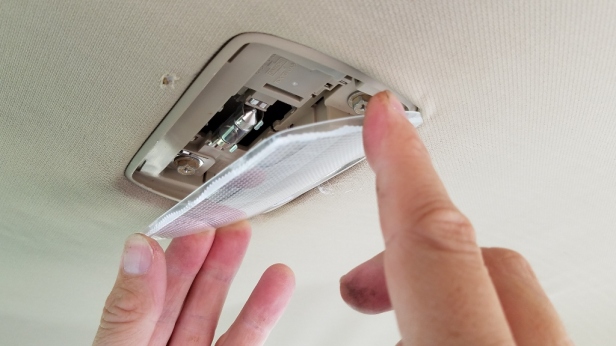
The headliner was loose at the back, and a few patches were loose near the front also. So the showtime stride was to remove the dome light. Use a flat bladed screwdriver to pry between the transparent part and the opaque plastic, and popular out the lens.
Remove the plastic embrace.
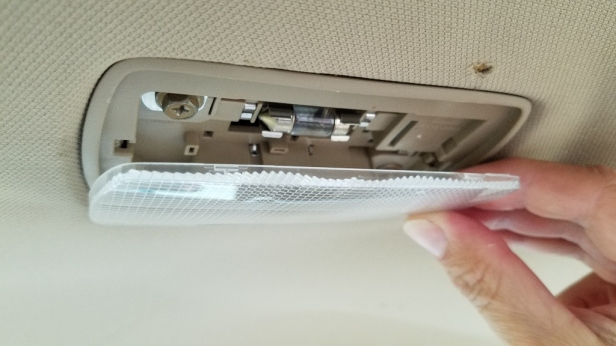
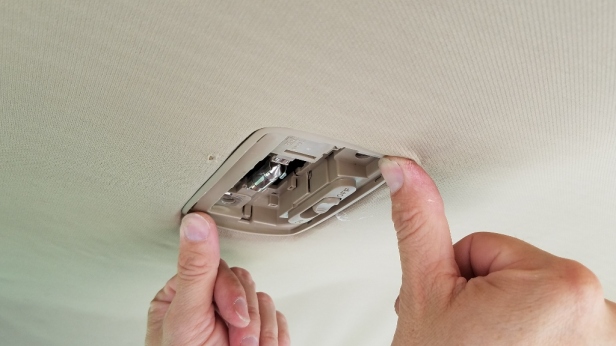
This is what yous will see. The two Phillips head screws volition be removed next.
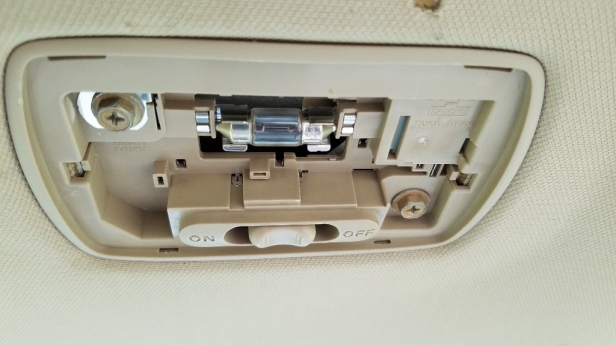
Use a screwdriver to remove the two Phillips-caput screws.

The dome light housing volition then pop out when y'all pry on information technology lightly with the flat screwdriver. Don't pull it downwardly correct away, in that location is a power cord running to it that will need to be released first.

Next, unplug the power cord going to the light housing. Notice that it has a small tab that should be pressed down in social club to remove it.

Set the housing somewhere where information technology won't become sat on…


At this point, you have a decision to make, should you remove the other plastic parts on the ceiling, such equally the handles, etc…? It really depends on how serious the problem of the drooping textile is. If it is loose around these parts, then it is probably a good idea to remove those likewise. In my example, the fabric was even so holding in those regions, and so I left them on.
past the way, the amount of headliner fabric required to re-cover your ceiling is around 2 cu. yds. (72″ 10 60″) or three cu. yds. (95″ x 60″) if you have a sunroof.
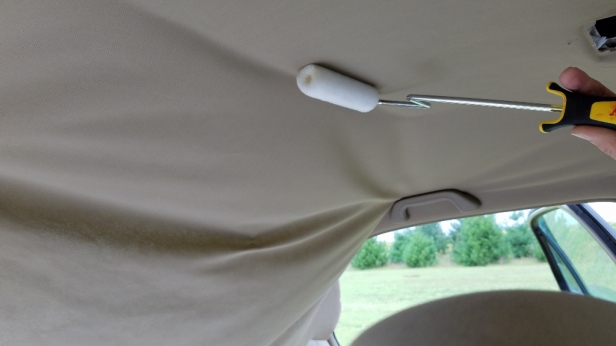
The adjacent step is to pull down the headliner enough so that you can reach all of the places where you need to spray the adhesive. If information technology is sticking well somewhere,leave it! Don't create extra work for yourself.
Note: You demand to be able to spray the adhesive with the can four″ to 8″ away from the surface that you are trying to glue. Spraying the adhesive further than this will cause it to clump up similar giddy-string and not adhere besides.

This is how far I ended up pulling my headliner downwards so that I could attain in far enough to spray adhesive on all the loose places.

Looking in between the headliner and the roof looks like this.

Hither is the expanse around the dome light.

Be gentle when pulling the fabric out from around the pillar. You don't want to stretch or tear information technology.


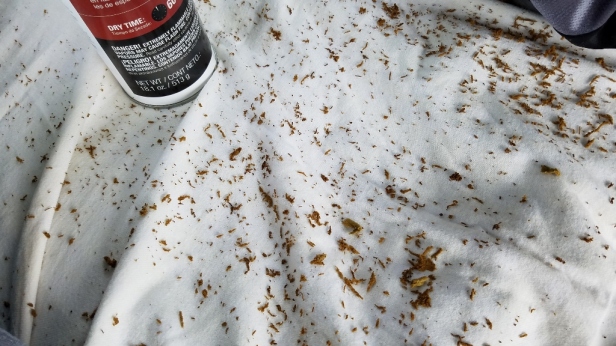
Alright, at this point, things could get a scrap messy. Utilize an quondam sheet or a tarp, and spread it out over the seats to preclude as much dust and overspray from getting on them equally possible.

There will be pasty foam still fastened to the fabric.

This will not allow the adhesive to stick very well, then remove as much of that every bit you can just by scraping it off with your finger.
Once the fabric is cleaned off, we are ready to beginning spraying the adhesive. A couple of notes to make things work meliorate for you:
- The agglutinative works best if it is sprayed 4-8 inches away from the surface. More than than this, and it will not stick very well!
- Work in small patches at a time. For example, in this case it was best to spray the agglutinative on almost 6-12 inches, let the spray gear up for about 5 minutes, and then press information technology into identify. Avoid the temptation to just do it all at in one case.
- Don't offset pressing the headliner on too before long. Wait about 5 minutes, otherwise it volition exist likewise moisture and volition go out wet looking spots in your headliner!
- Don't wait too long, either! More than than about x-xv minutes, and the agglutinative will brainstorm to dry up too much.
- The adhesive is VERY sticky. Yous only accept one shot at pressing it into place. Trying to pull off a spot that has already been glued will not end well, therefore plan well so that you don't take to do this!
- Don't let the headliner fold back on itself with agglutinative on information technology! It volition stick to itself (accept yous ever had duct-record fold back on itself, sticky-side to -sticky-side?). It will not be easy to go information technology apart, and will never look the same! This is particularly important near the back, where y'all have loose end that can easily curlicue back on itself.
Okay, ready? Let's do this. The spray is quite strong, so make sure you are working in a well ventilated expanse, and wear a animate mask if possible. Roll downwardly the windows or open up the doors also.
Take your can of headliner agglutinative and spray virtually six″ worth of headliner, then let it set for 5 minutes.

Spray in about 6″ sections at a time.

Here, about 6″ of spray has been applied across the width of the headliner.

Notice the 'stringy-ness' of the adhesive as it begins to set.

Then, from underneath, employ the clean paint roller to press the headliner into place, starting from the front and working backwards.


Once that is looking practiced, spray some other 6 inches or so, allow it set for 5 minutes, and so printing that into place with the roller.

I used a smaller paint roller to go effectually the edges where in that location was more of a curve.
Keep doing this until you get to the back. Then, apply a scrap of cardboard to catch the over-spray, and press that into place with the roller.

Near the bulkheads, employ the sparse putty knife or credit card to press the headliner back into place behind the plastic.

I got a bit of the adhesive spray on the plastic pillar… It was difficult to get off, and so try to avoid that if possible!

Take intendance along the back edge every bit well. If it doesn't line up perfectly, don't be tempted to pull information technology off and endeavour again, it will not work! This will prove how well you did in smoothing the headliner from the front.
Give the headliner plenty of fourth dimension to dry, and then put the dome light dorsum on.
Put the power wire clip dorsum onto the housing pins.

Make certain it is in the correct orientation and not backwards.

Gently printing the housing back into place in the ceiling.
Re-install the 2 screws.

Fit the cover into the front first.
And snap the lens cover dorsum in place.

Printing gently until it clicks.

That'southward it. I really hope you were able to get some amount of benefit from this post!
Tools and Supplies Used:
- flat-bladed screwdriver
- 3M headliner adhesive spray
- Phillips screwdriver
- sparse plastic putty pocketknife (or credit carte-blazon object)
- clean paint roller
- breathing masks
For more maintenance articles on Honda Accords, cheque out these posts!
Nevertheless Not Working? Desire to Effort Something Else?
If the agglutinative spray method isn't up your alley, there is a simpler fix…
It involves installing buttons on the ceiling to concord the headliner up. Information technology volition take you about 30-45 minutes to install the buttons, and y'all will then have a more permanent ready. Ready to try it?
Hither is the drooping headliner "Before and Afterward:"

The kit comes with 60 push-pins and 60 buttons. Kickoff by putting the push button-pins in the center of the falling headliner, so that y'all have equal amounts of sag on both sides. This will ensure the headliner doesn't become crooked!

After getting a line of push-pins down the center of the ceiling, then piece of work your way outward with pushpins until the entire headliner is more than or less in identify.

In one case you are satisfied that yous will have enough headliner material on both sides, and one side isn't shorter than the other, get alee and start installing the buttons.
The buttons work by screwing the screw into the hard cream above the headliner. Employ a Phillips screwdriver.
Tighten the screw until it is nice and snug, but don't 'strip' it out, or information technology won't concur tightly. It is pretty piece of cake to experience where that indicate is once you've done a couple.

Later on the button is screwed in, press the button-snap on summit of it.

Then remove the push button-pins. Note that the push-pins go out a tiny hole. The holes aren't as obvious in one case they've been out for a while, but if you are worried about it, install the buttons on top of where the push-pins were.

I recommend installing the buttons about 6-8 inches autonomously. A cloth tape measure out is included with the kit.
Likewise, come up upwardly with a pattern ahead of time, and measure out out so that the buttons go installed evenly.

Once you have almost of the buttons installed, press the headliner back behind the trim using a credit card (Finally, a use for that top-golf membership card!).

The ceiling looks pretty custom one time all the buttons are installed.

And all-time of all, no more drooping headliner!

This is the Headliner Button Repair Kit I bought and used.
I promise this helps if you lot have a drooping headliner!
Source: https://practicalmechanic.com/2018/09/06/how-to-repair-a-drooping-headliner/
0 Response to "How To Repair Headliner In Car"
Post a Comment