

How To Install Sram Cassette
This article will review the removal and installation of cassette cogs on derailleur-blazon bicycles. The threaded freewheel system is discussed at Freewheel Removal and Installation.
1
Getting Started
What exercise I need to know how to do?
- Wheel Removal and Installation - View Article
- Determining Cassette / Freewheel Type - View Article
What Tools do I need?
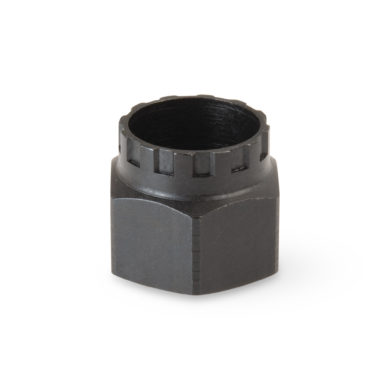
- Cassette lockring remover: FR series
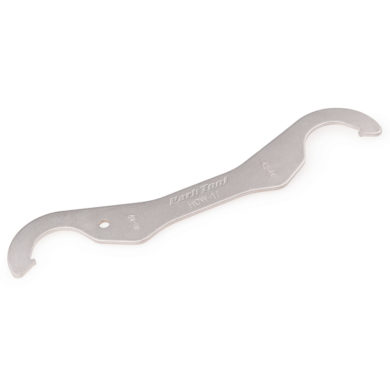
- Chain whip — select every bit needed: CP-1.two, SR-12, SR-18.two, HCW-16.3
- Freewheel tool wrench: FRW-1 (substitute big adjustable wrench or vise)
- Grease, such equally PPL-1 or ASC-one anti-seize blazon lubricant
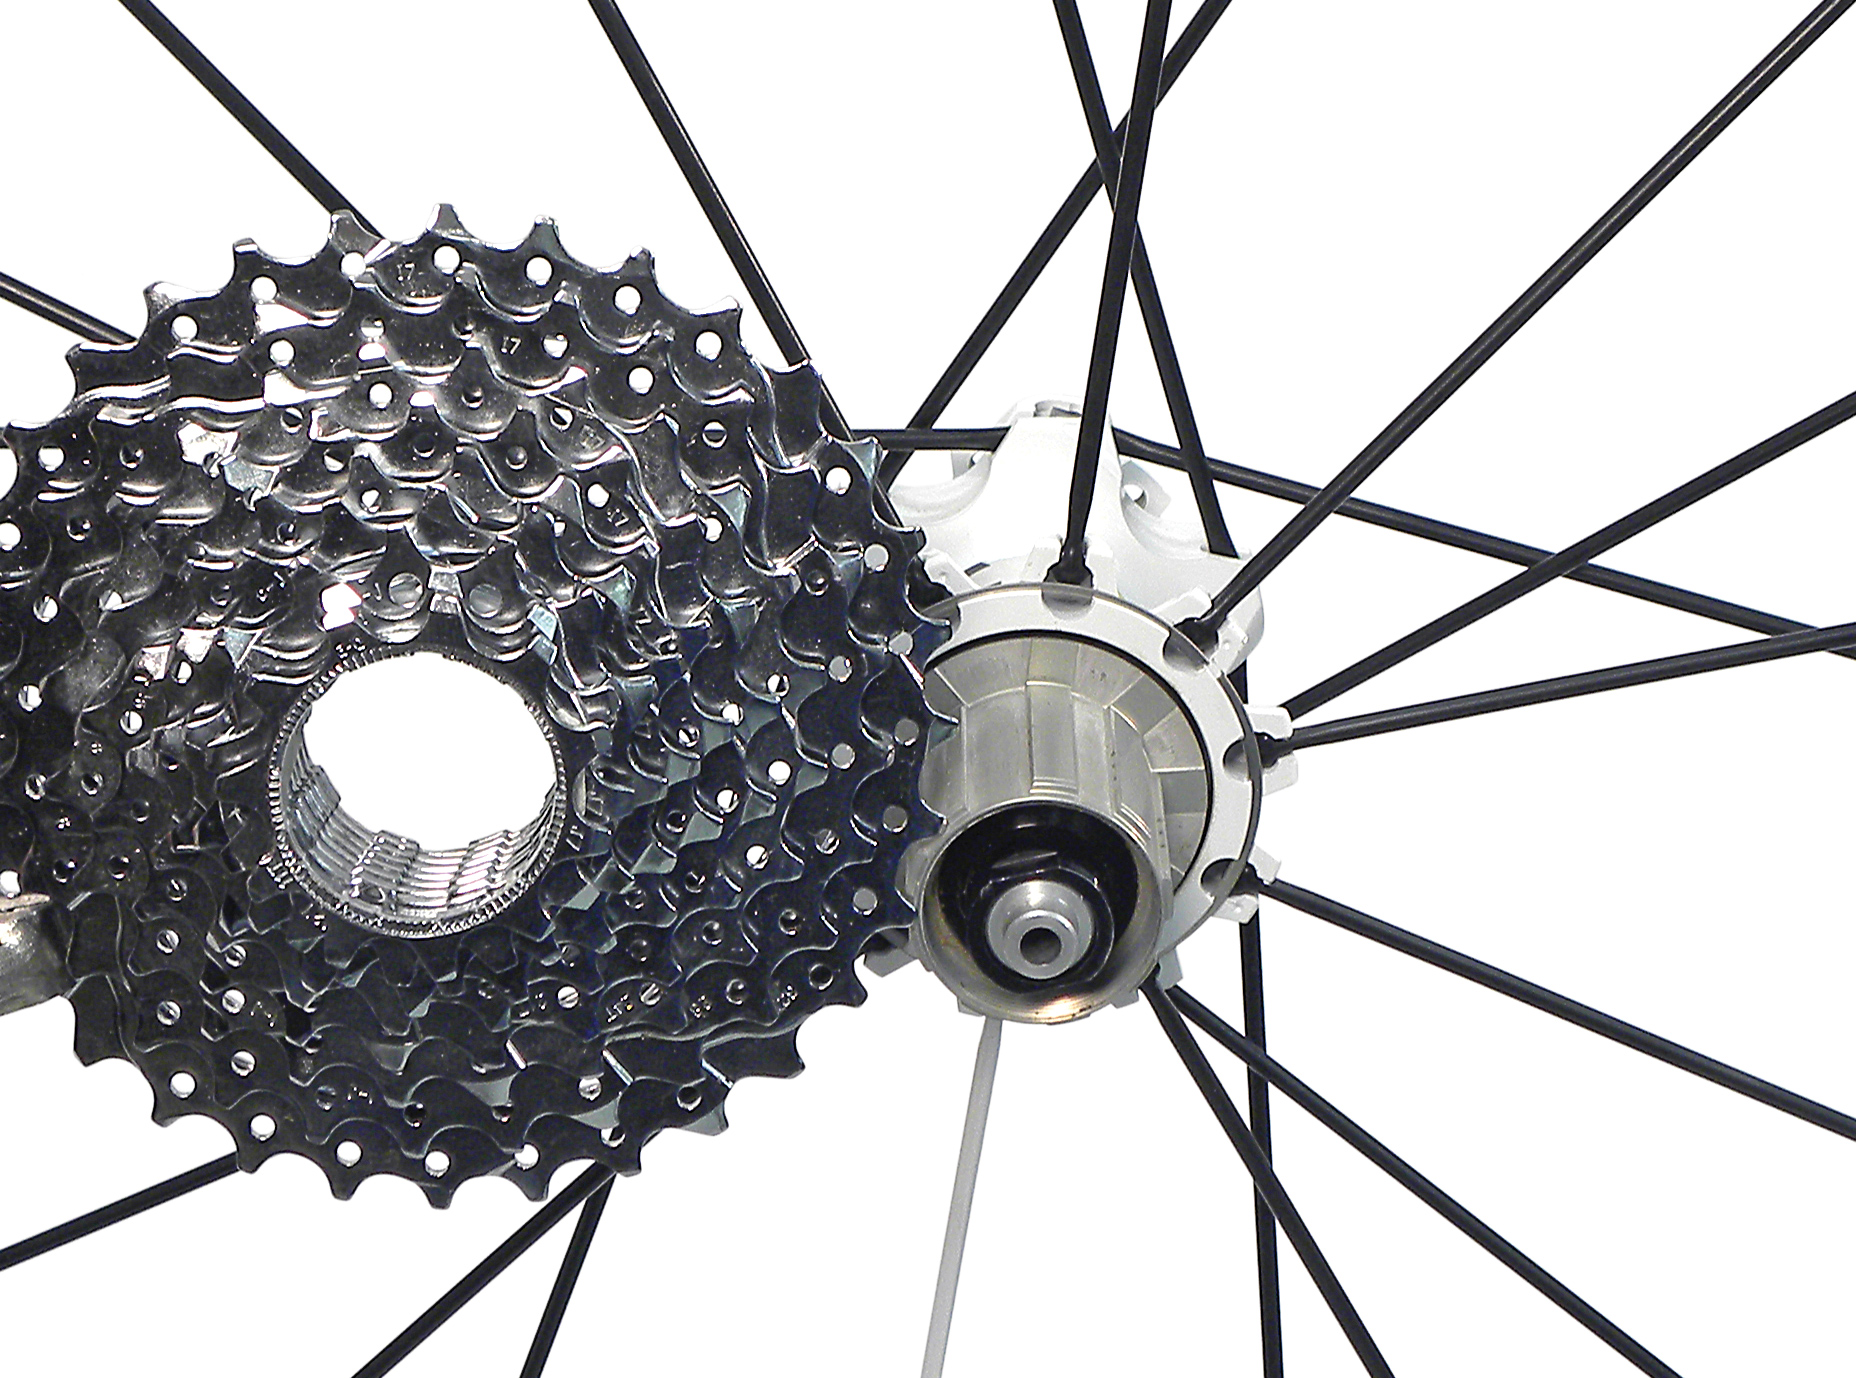
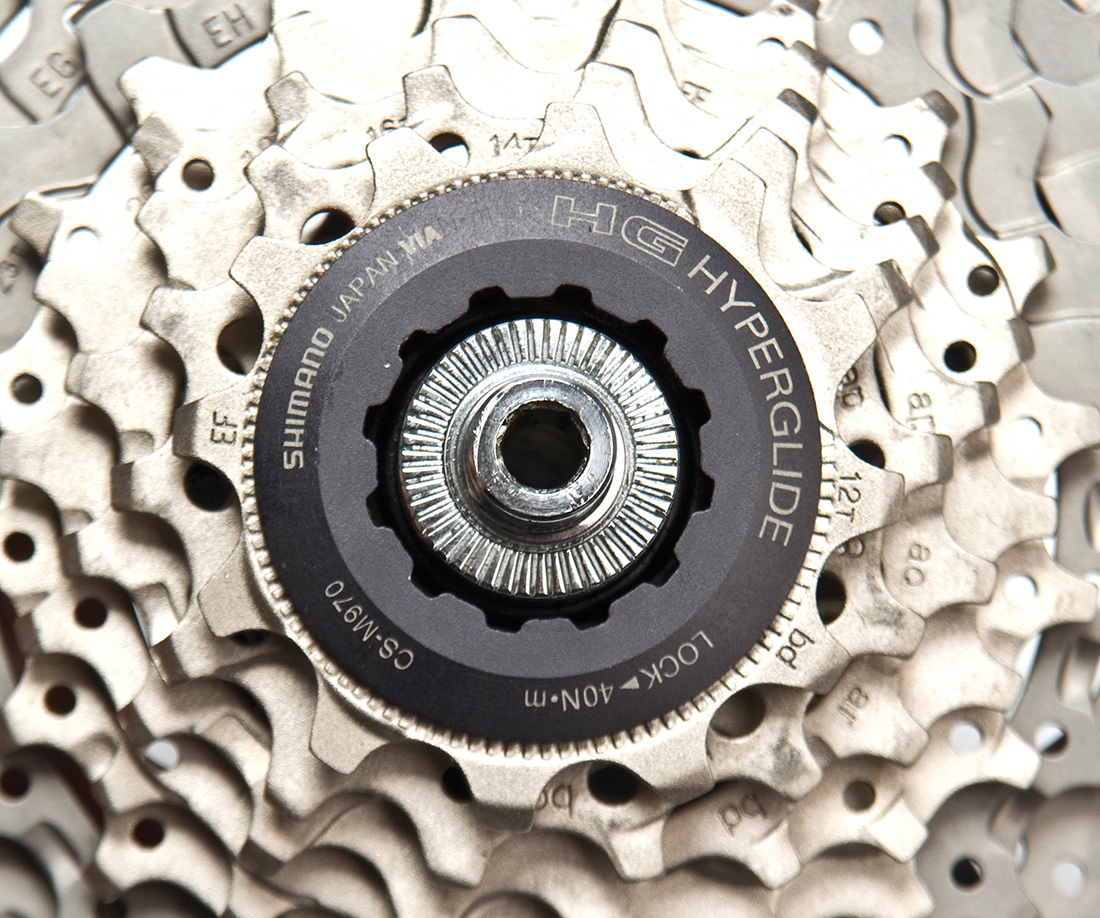
The rear cogs are attached to the hub in 1 of two ways. Newer bikes tend to use the type of hub called a "cassette hub." The cassette hub uses a "freehub" system, which is a type of clutch mounted to the body of the hub. This cylindrical mechanism ratchets counter-clockwise for coasting, and locks clockwise for driving the bike when pedaled. The freehub body has a series of splines on the outer shell. "Cassette" sprockets slide over these splines. A lockring threads into the freehub and holds the sprockets, or cogs, in place. When the cogs are removed, the ratcheting freehub remains on the hub body. Most modernistic bicycles employ the freehub system. Run across a typical cassette hub below.
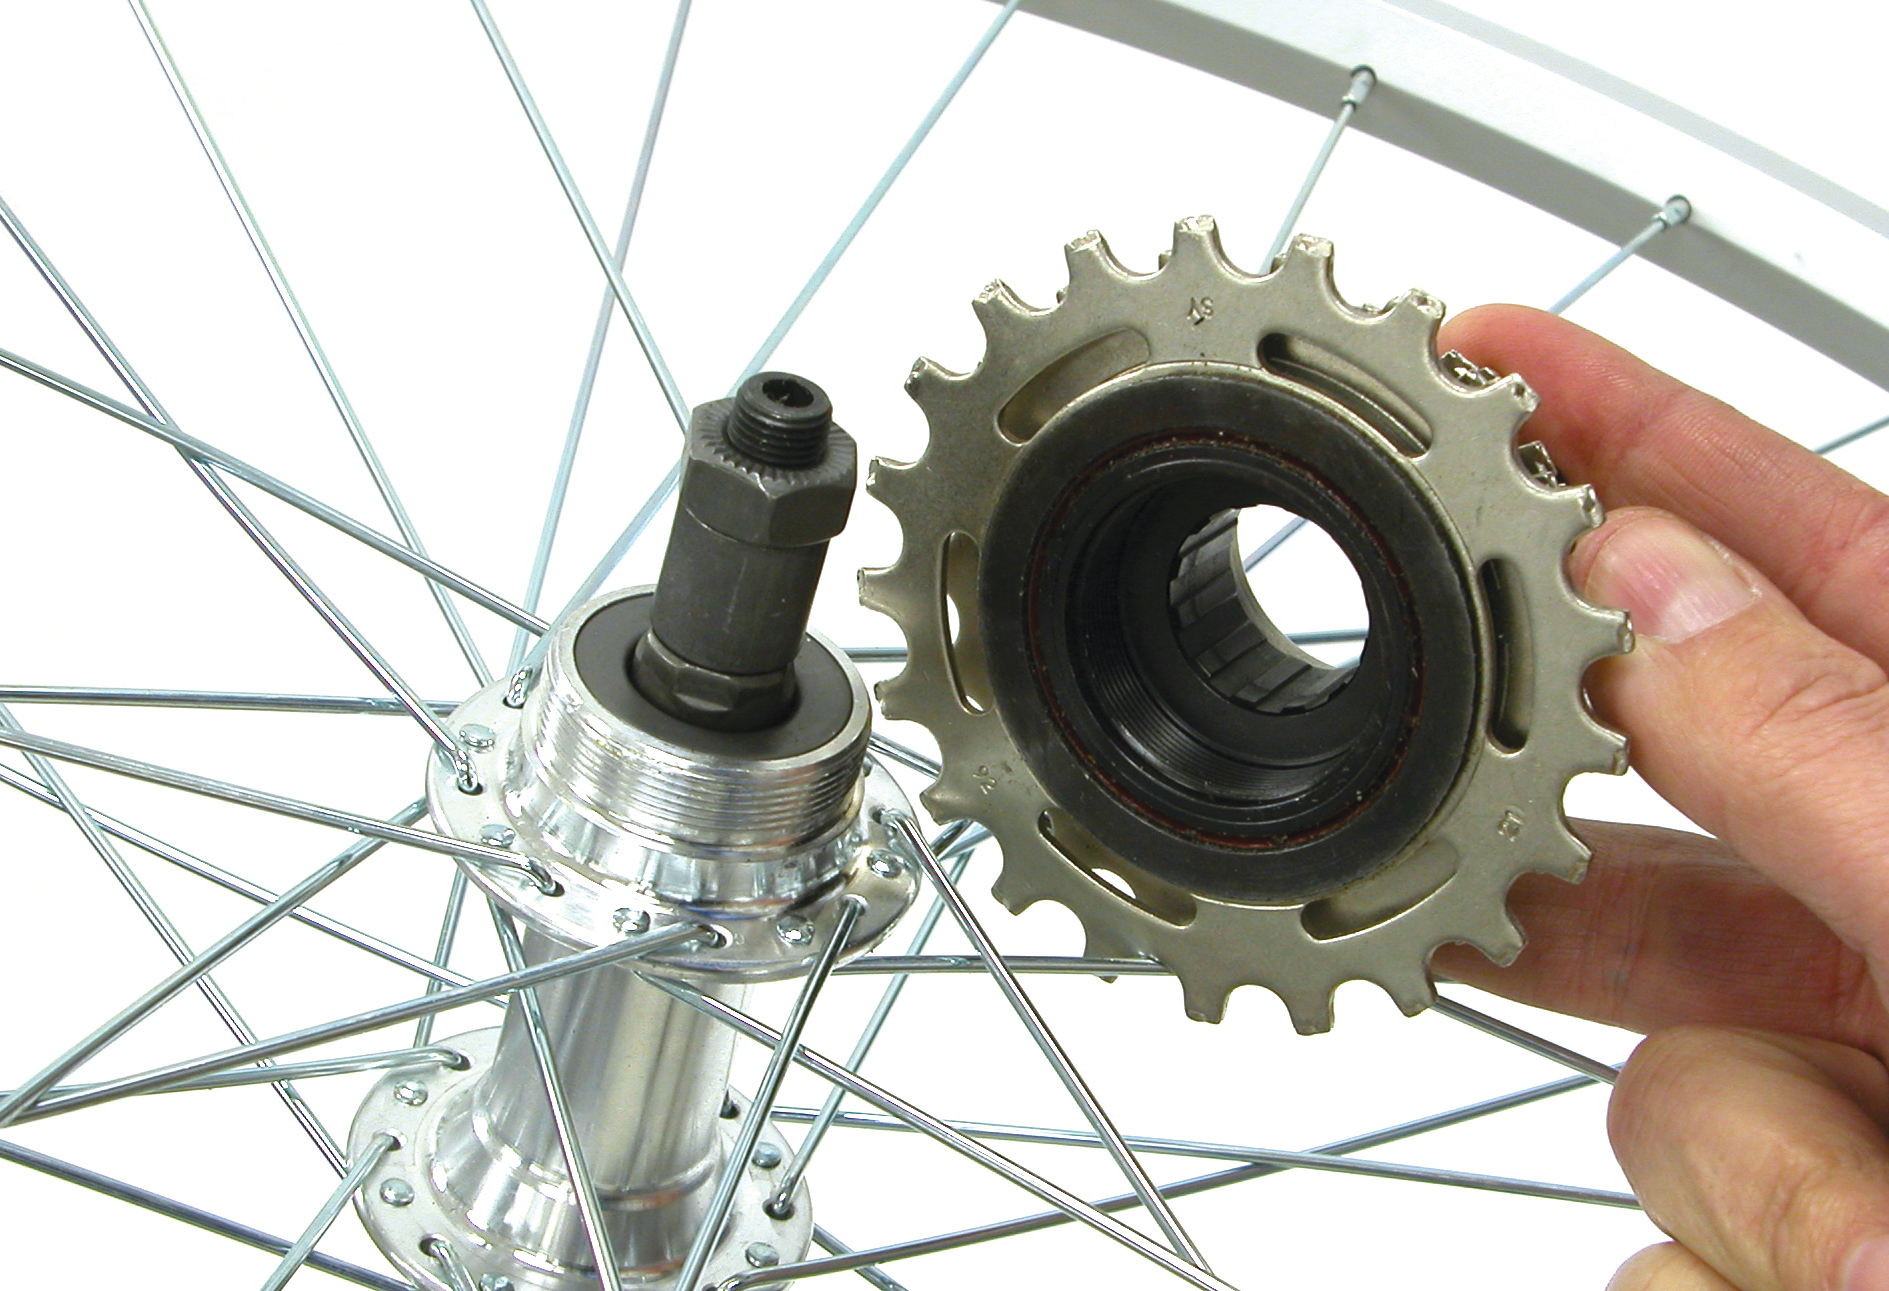
Older bikes may have a large external thread machined into the hub. The cogs and ratcheting body assembly, chosen a "freewheel," threads onto the hub. The ratcheting mechanism comes off with the cogs when the freewheel unthreads for removal.
This article volition review the removal and installation of cassette systems. For freewheel systems, see Freewheel Removal and Installation.
two
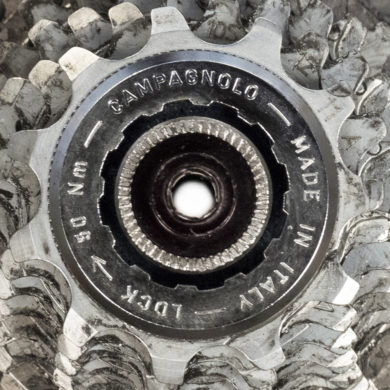
Cassette Lockring Tool Compatibility
You volition need to determine the way or brand of cassette you have. The tabular array beneath shows every style that has a compatible installation & removal tool made by Park Tool.
| FR-5.2, FR-5.2G, FR-v.2GT, FR-v.2H | |
|---|---|
| Shimano®, SRAM®, Chris King®, Lord's day Race®, Hugi®, etc. cassette lockrings | 12 splines, approx. 23.4mm diameter |
 |  |
| BBT-5/FR-11 | |
| Campagnolo® cassettes | 12 splines, approx. 22.8mm diameter |
 |  |
| HCW-17 | |
| Single-speed external notch lockring | ii to 8 external notches |
 |  |
As a dominion of thumb, if the wheel has a Campagnolo make shifting system, it is likely it will have a Campagnolo compatible lockring. Utilise the BBT-5/FR-11 for these bikes.
three
Cassette Lockring Removal
If your cogs expect like this, you lot probably have a lockring type cassette.
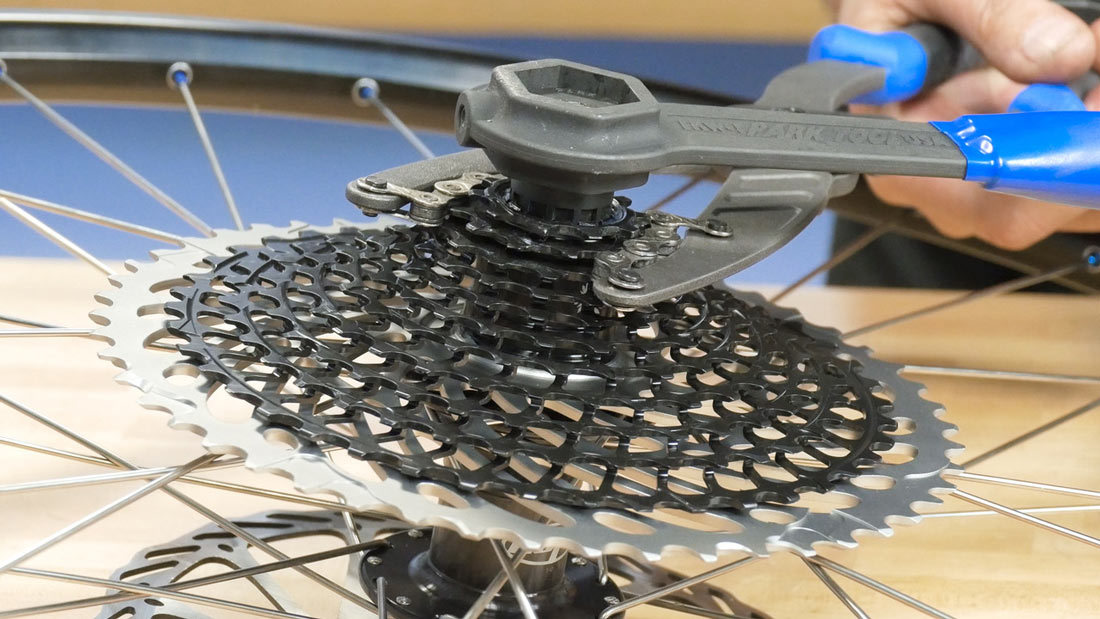
With the modern cassette cog systems, all cogs are fitted with splines. Cogs slide onto the freehub body and are held in identify past a lockring. The lockring sits outward from the smallest cog. Wait for the give-and-take, "LOCK", and an arrow on the lockring indicating direction to turn for locking. Turn the lockring counter-clockwise, the opposite way of the pointer, to loosen information technology. There may exist a loud racket when the lockring breaks loose. There is often knurling under the lockring to assist keep information technology in identify, and this knurling makes racket when the ring is loosened or tightened.
- Mount bike in repair stand and remove rear bicycle from bicycle.
- Remove quick-release skewer.
- Inspect cassette and select right blazon of remover.
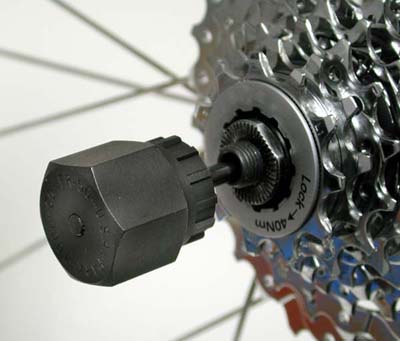
- Engage remover into splines/notches.
- Install quick-release skewer and install skewer nut on outside of remover.
- Snug skewer nut against remover. The skewer acts as a property device for freewheel removal tool.
- Hold cogs in clockwise direction with sprocket concatenation whip tool. Turn remover counter-clockwise, using a big adjustable wrench, the hex cease of some other Park Tool sprocket chain whip tool, or the Park Tool FRW-one freewheel wrench. It will require force to remove the lockring. Expect to hear a loud clicking audio as the locking teeth of the lockring carve up.
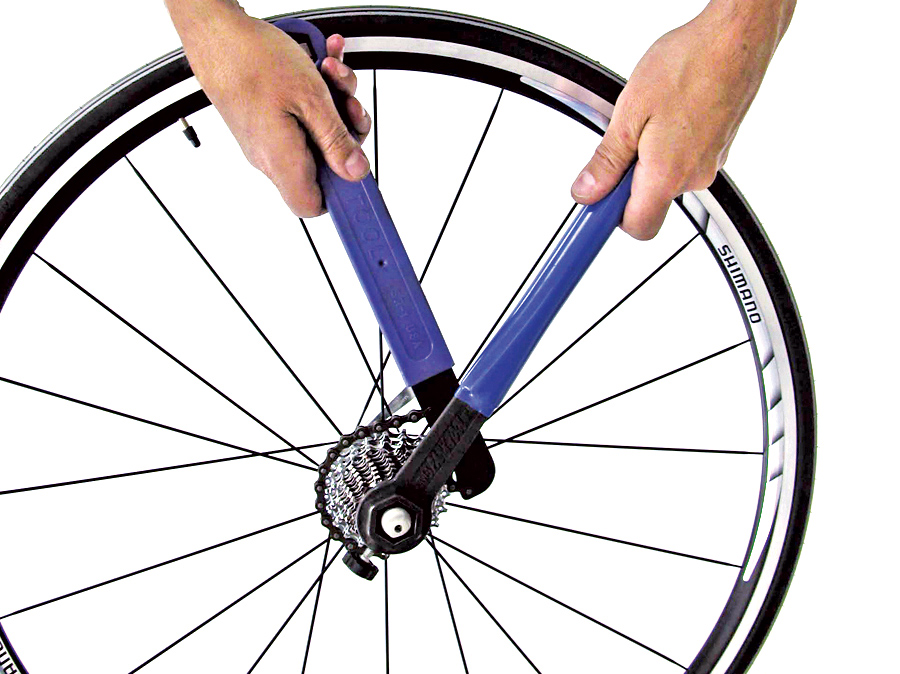
- If using a vise, grab removal tool tightly in vise with wheel held apartment. Use sprocket concatenation whip tool to plough sprockets counter-clockwise, as seen from above the hub. Exercise non hold bicycle while turning sprockets, allow bicycle to rotate, and pull merely on sprocket chain whip tool.
Using FR-5.2G or FR-five.2GT with Guide Pin
The FR-5.2G and FR-5.2GT include a guide pin for greater stability during the removal and installation procedure. Remove the skewer or thru axle and install the FR-5.2G or FR-v.2GT. Make sure the teeth are fully engaged in the lockring. Agree cogs as described above and plow the tool counter-clockwise.
FR-v.2G is compatible with traditional hubs with skewers
FR-5.2GT is compatible with thru axle hubs
4
Cassette Lockring Installation
Cassette freehub bodies and cassettes are often designed so the cogs will fit in only one orientation. This permits manufacturers to align "shifting ramps" to specification.
- Audit splines of freehub body. Look for a wide space betwixt splines. Inspect the internal splines of cogs. Look for a wide spline to mate with wide space in freehub torso. Align splines and engage all cogs.
- Install spacers in same orientation equally when removed.
- Grease threads of lockring and thread lockring into freehub.
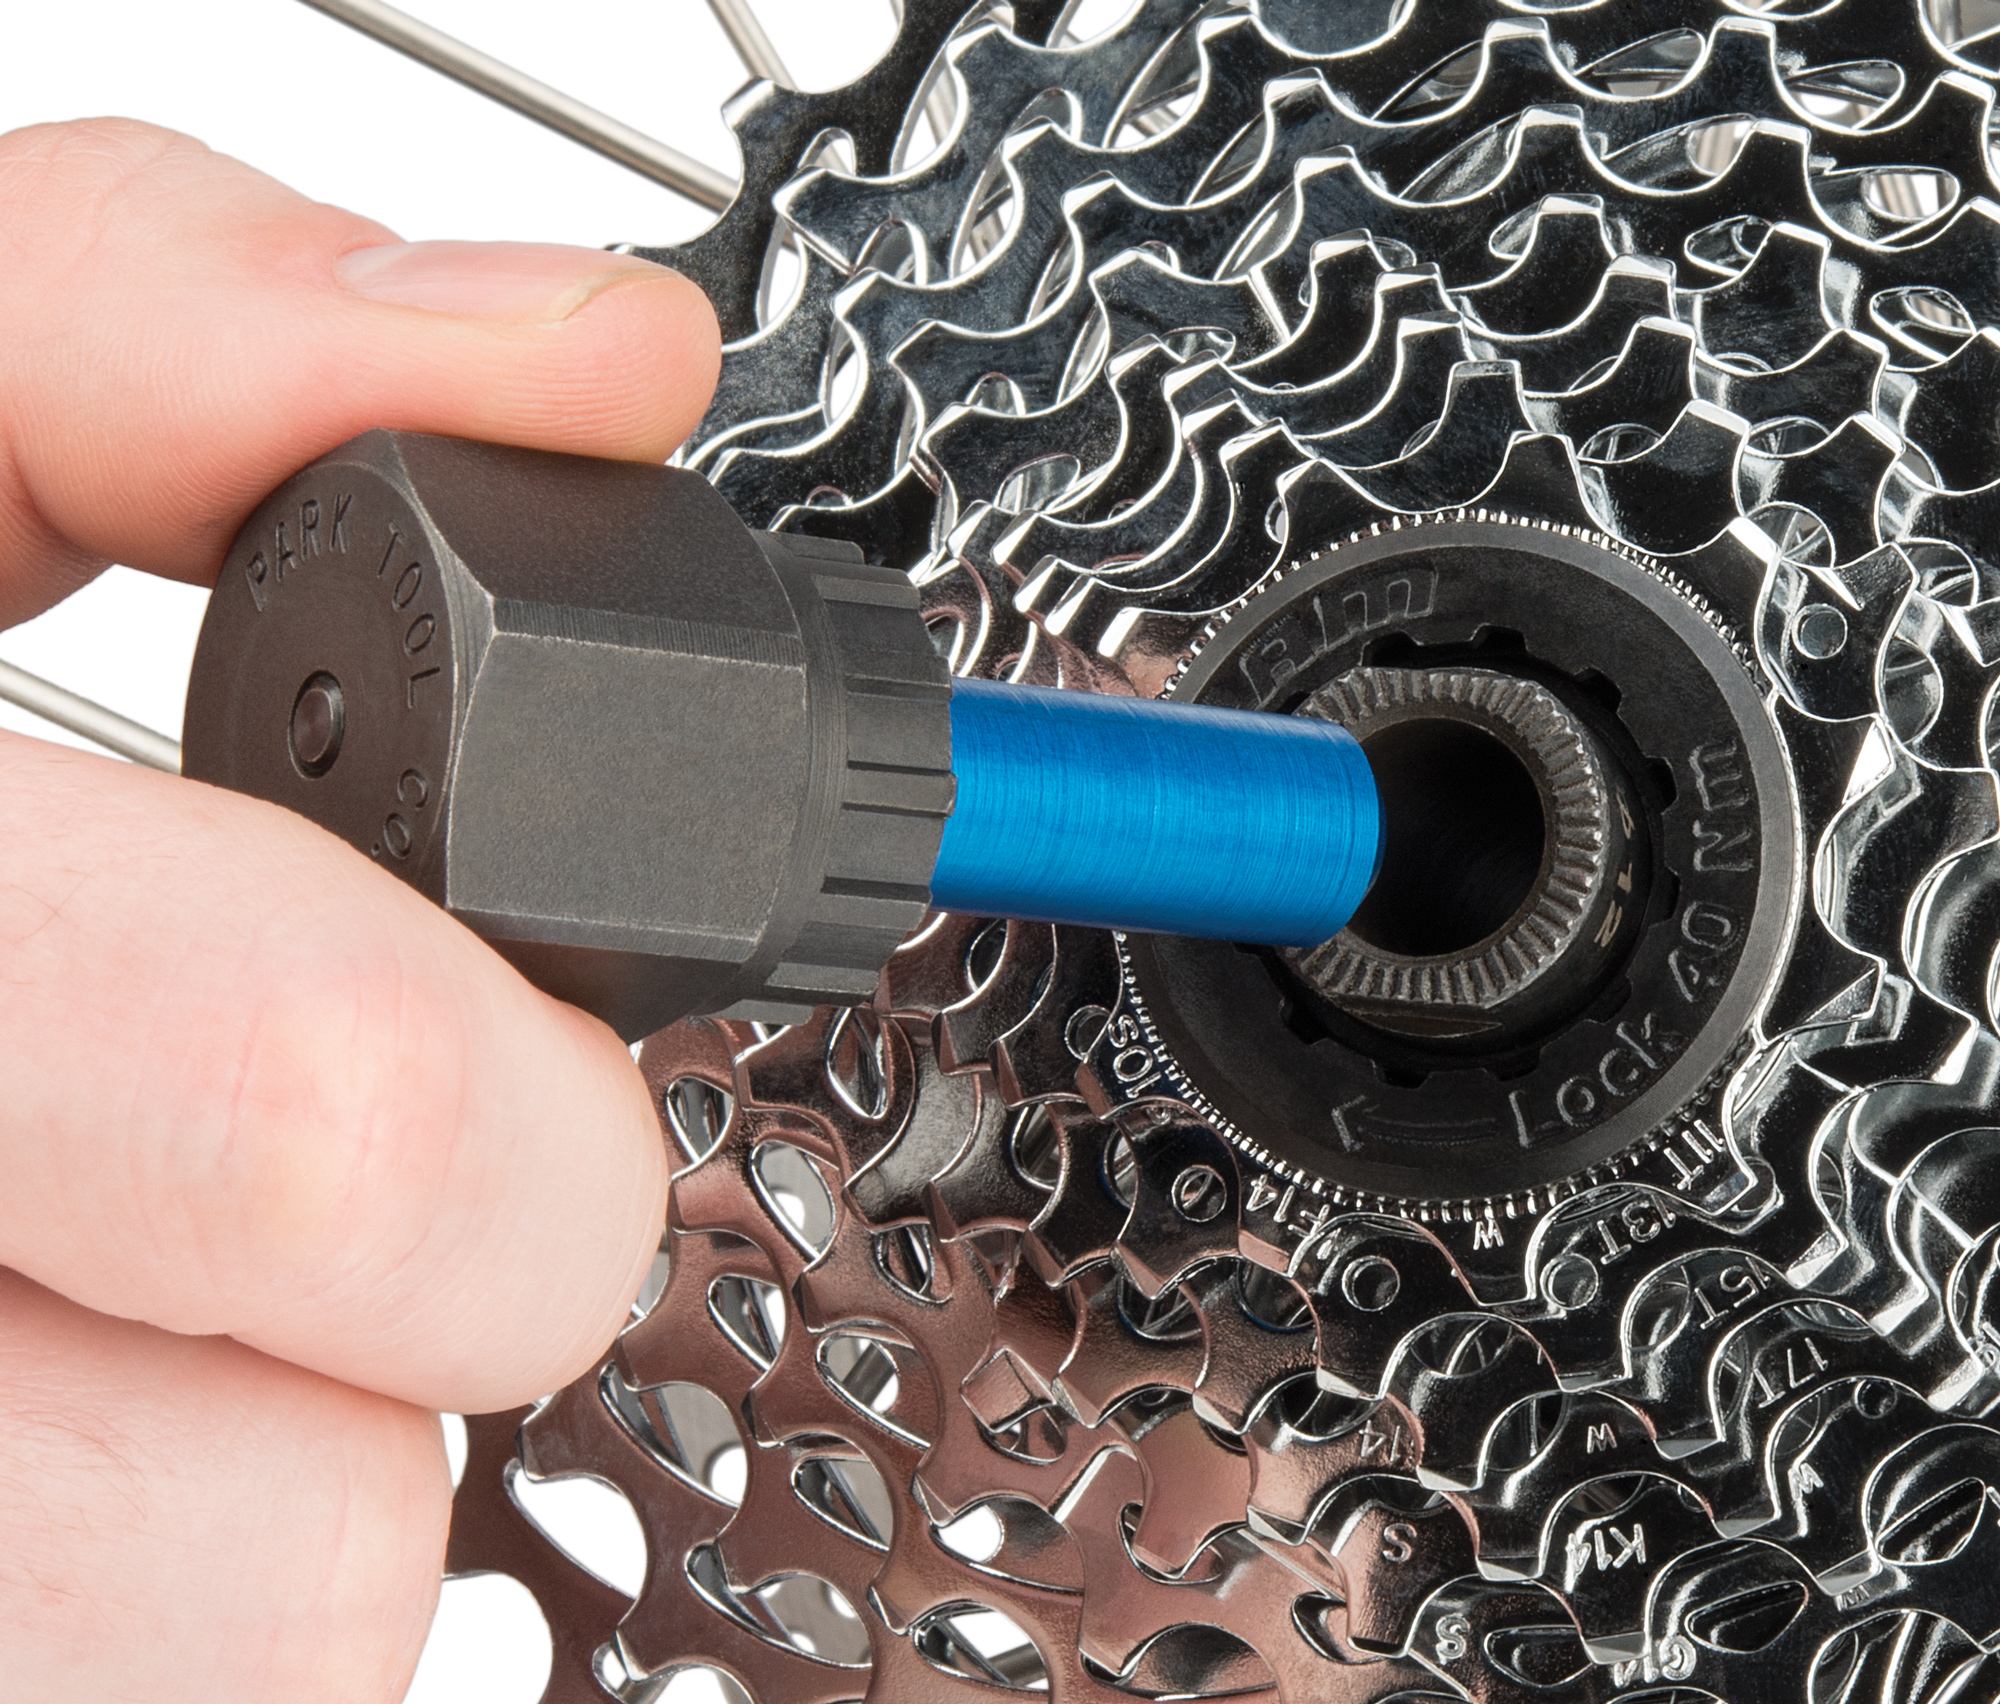
- Install cassette lockring tool and install quick-release skewer. Thread skewer nut on outside of lockring tool.
- Snug skewer nut against remover. Skewer acts as a property device for freewheel tool.
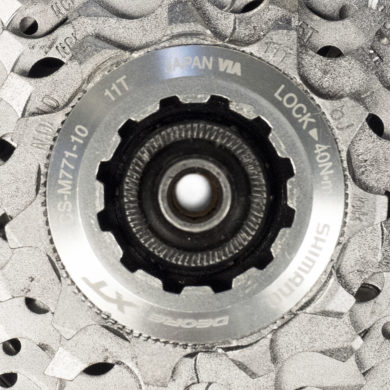
- Plow remover clockwise until lockring is tight, at least 360 inch-pounds (approximately twoscore Nm). For installing lockring, utilize of the sprocket chain whip tool is not required.
The FR-5.2G speeds installation equally well. Only insert the FR-5.2G into the lockring splines and tighten fully.
5
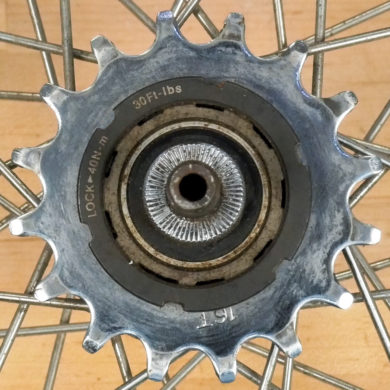
SRAM Uniform XD Freehub Cassettes
SRAM XD freehubs and sprockets are considered a cassette arrangement. The lockring machinery is hidden downward inside the cassette stack. Audit the inner perimiter of the smallest sprocket for 12 splines. Use the FR-five.2, FR-5.2GT, FR-five.2H, or FR-five.2G on this plumbing fixtures.
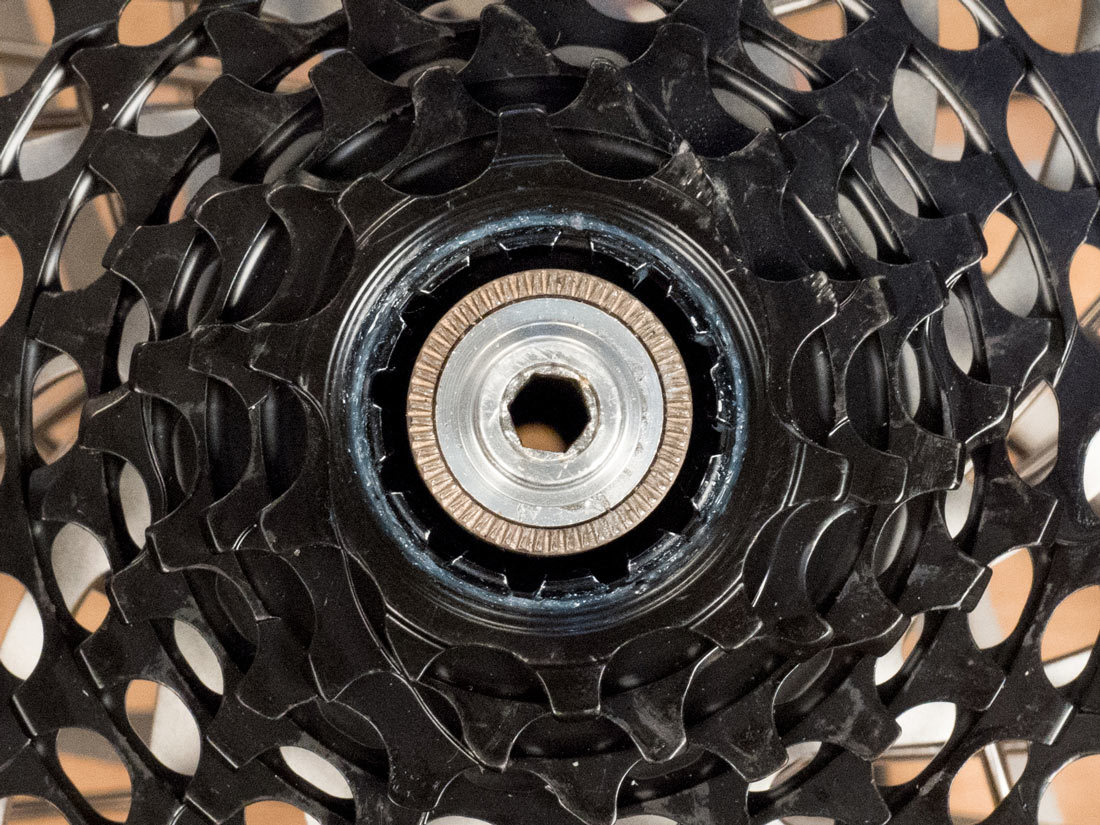
To remove the cassette, hold it from spinning using a chain whip. Insert the lockring tool (use the FR-5 series), and turn the tool counter-clockwise. The locking band will unthread from the freehub and the cassette will lift upwardly.
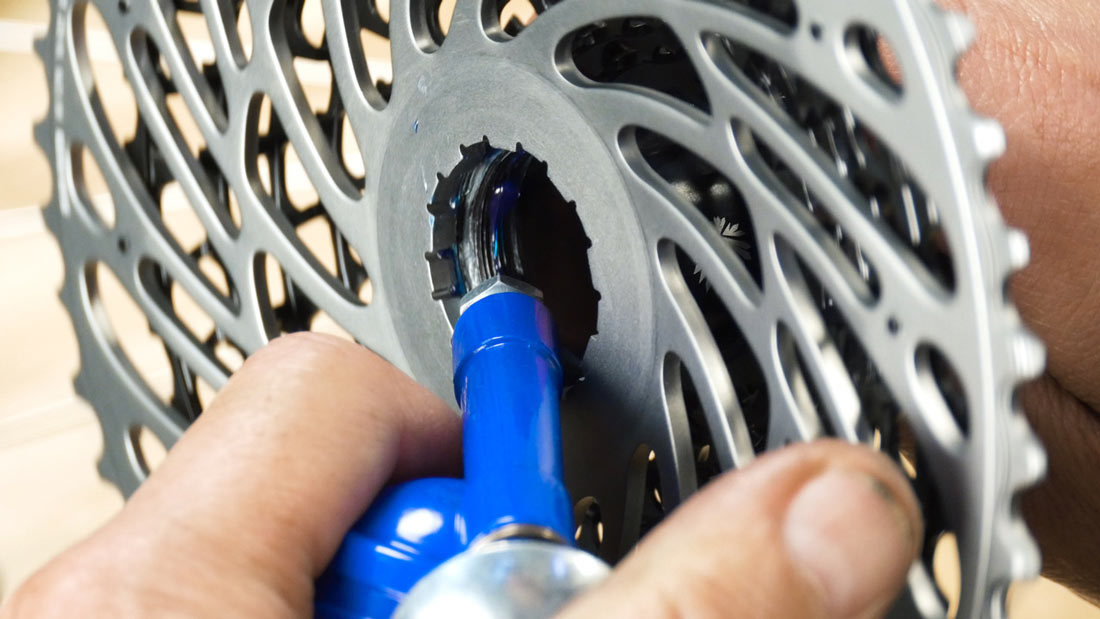
To install the cassette, lubricate the threads inside the cassette stack. Place the cassette on the freehub body, and use a tool to plough the locking ring clockwise. Secure to approxiately 40Nm.
6
Not-Lockring Freehub Cog Removal
Older freehubs may lack notches or splines adjacent to the axle. These older freehub cogs did not use a freewheel or cassette lockring removal tool. There will be a grit cap for the hub on the right side, but no recessed notches or lockring splines at all. The first cog acts as a lockring for the other cogs.
- Using two chain whip tools, place first concatenation whip on 2nd or 3rd cog, holding it clockwise.
- Place 2nd chain whip on showtime cog to rotate information technology counter-clockwise.

- Conform chain whips so they grade a "V". This gives you lot better mechanical reward. Meet paradigm above.
- Rotate beginning cog counter-clockwise while holding the other concatenation whip. This loosens first cog. Remove cog and pull off other cogs.
seven
Non-Lockring Freehub Cog Installation
- Grease threads of smallest cog.
- Install cogs and spacers on freehub.
- Thread on smallest cog and secure clockwise with sprocket concatenation whip tool.

Source: https://www.parktool.com/blog/repair-help/cassette-removal-and-installation
Posted by: fisherhents1988.blogspot.com
0 Response to "How To Install Sram Cassette"
Post a Comment